The following example demonstrates creating a custom field to later be utilized by the Screen Designer module. Please see Custom Fields in the TeamConnect Setup and Development Guide for further information on custom fields in general as well as specific details on how they function in TeamConnect Enterprise.
For our example, we will assume that our Contacts records would benefit from having a check-box "Discount Eligible" custom field as well as a number-entry field for "Discount Eligible Amount." The steps below detail creating these fields. For more detail on creating interactions based on this field, please see Designing Interactions in the Screen Designer guide.
1. Navigate to Setup  in TeamConnect.
2. From the Go to... drop-down list, select Object Definitions. Click Contact from the resulting screen.
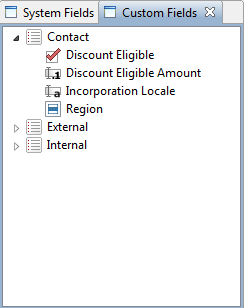
3. Click the Custom Fields tab.
4. Add the Field Name, Label, and Field Type as well as other desired fields for "Discount Eligible." For this use case, we will use "Check Box." Click Add More when done. Note: The Field Name cannot include special characters or spaces. The Label field can include spaces.
5. Add the Field Name, Label, and Field Type as well as other desired fields for "Discount Eligible Amount." For this use case, we will use "Number Field." Click Add More when done.
6. Click Save and Close.

Custom Fields Added
The fields will be available upon logging into Screen Designer.