1.On your home page, click the Calendar tab, and then click the Appointments sub-tab link. 2.Click Scheduler. The first page of the scheduler wizard opens.
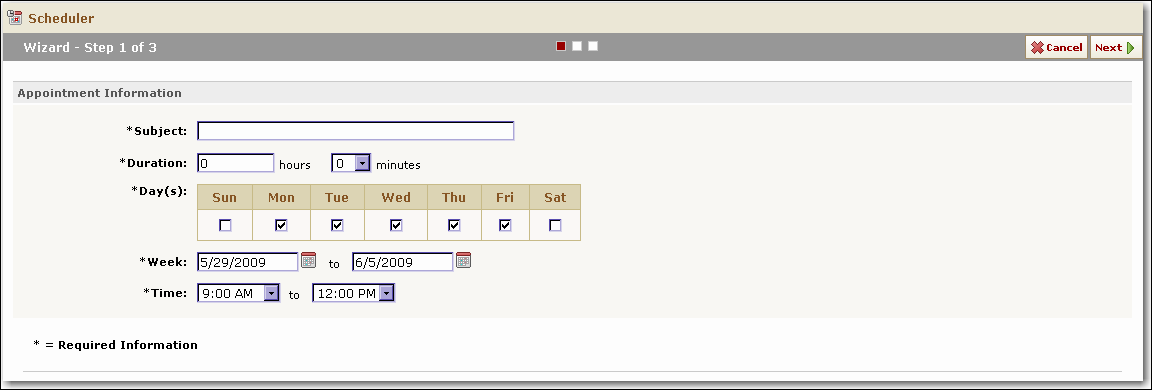
3.On the first screen complete the fields in the Appointment Information Field Descriptions table.  First Page of Scheduler 4.Click Next. The Attendees and Resources page opens.
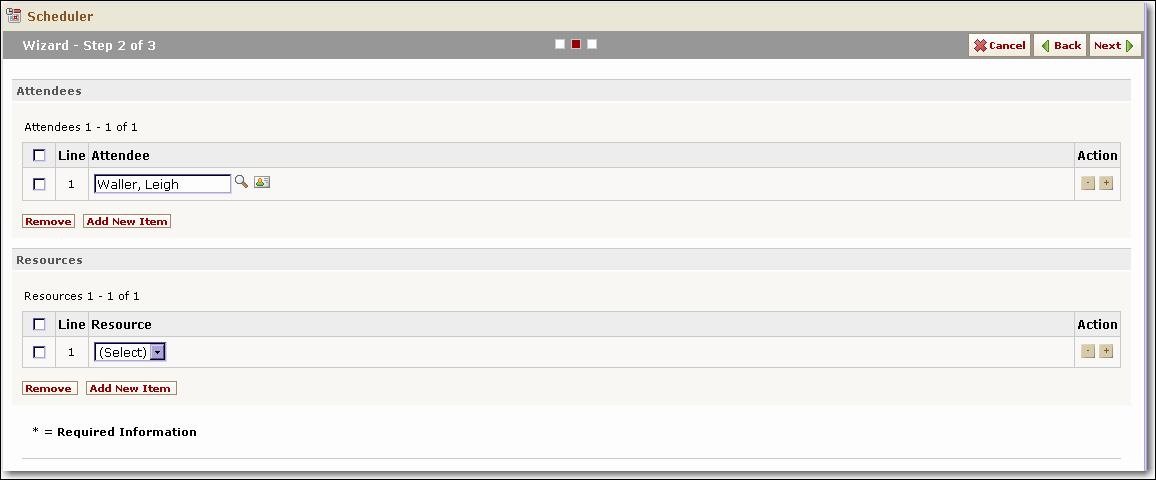
 Scheduler Wizard Page Two 5.In the Attendees field, select from the drop-down list or click the search icon to search for users or click the contacts icon to search for contacts. The selected user or contact appears in the attendees list. To invite additional users, click Add New Item and continue adding users until your list is complete. 6.In the Resource drop-down list, select the resources that you may need, such as a conference room or a projector. To select additional resources, click Add Another Item. 7.Click Next. Based on the criteria that you entered, the system searches the calendar of each attendee to find a date and time when everyone is available to meet, and then returns one or more results.
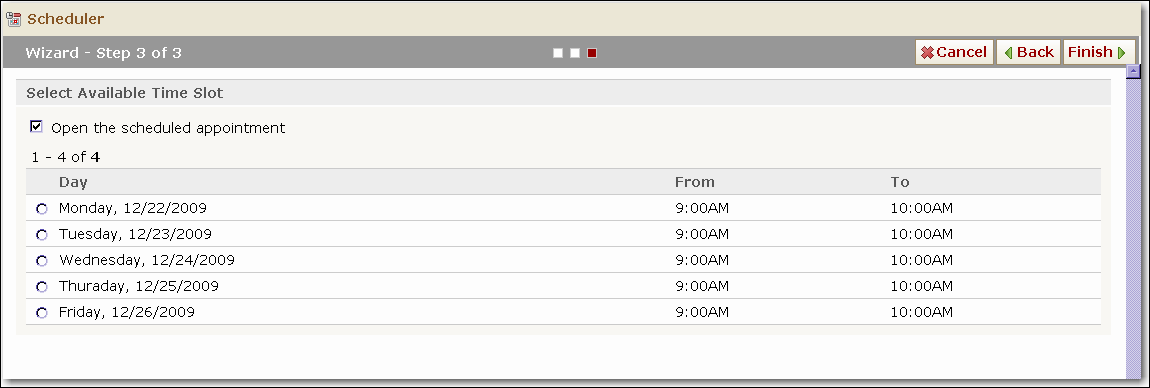
 Scheduler Wizard Page Three 8.On the Select Available Time Slot page, select the option that you prefer. If you want to open the appointment to its General page after the appointment is saved, select the Open the scheduled appointment check-box.
9.Click Finish. An email notification is automatically sent to the attendees if their preferences are set to receive email notification. See Setting Up Email Notifications for more information.
In response, attendees can use the appointment calendar to accept or decline the invitation. If an attendee accepts this invitation, the item is automatically added to their calendar.
|

